After logging into Salesforce Marketing Cloud, navigate to Email Studio. Then, access the Content tab.
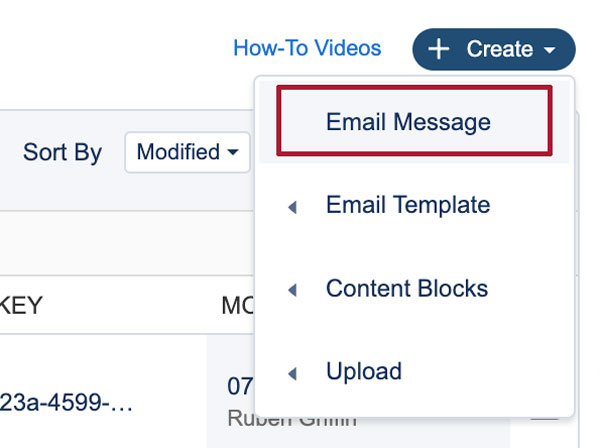
Step 1:
Hover over Create in the top right corner and select Email Message.
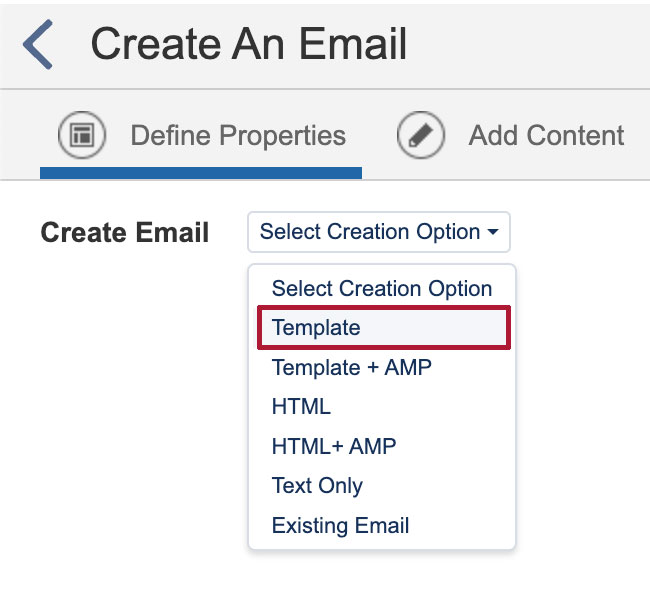
Step 2:
Choose Template from the Create Email select box.
Step 3:
Select the SAVED (1.) tab and choose Folders (2.).

Step 4:
Select the SHARED (1.) tab, then Search for brand- (2.).

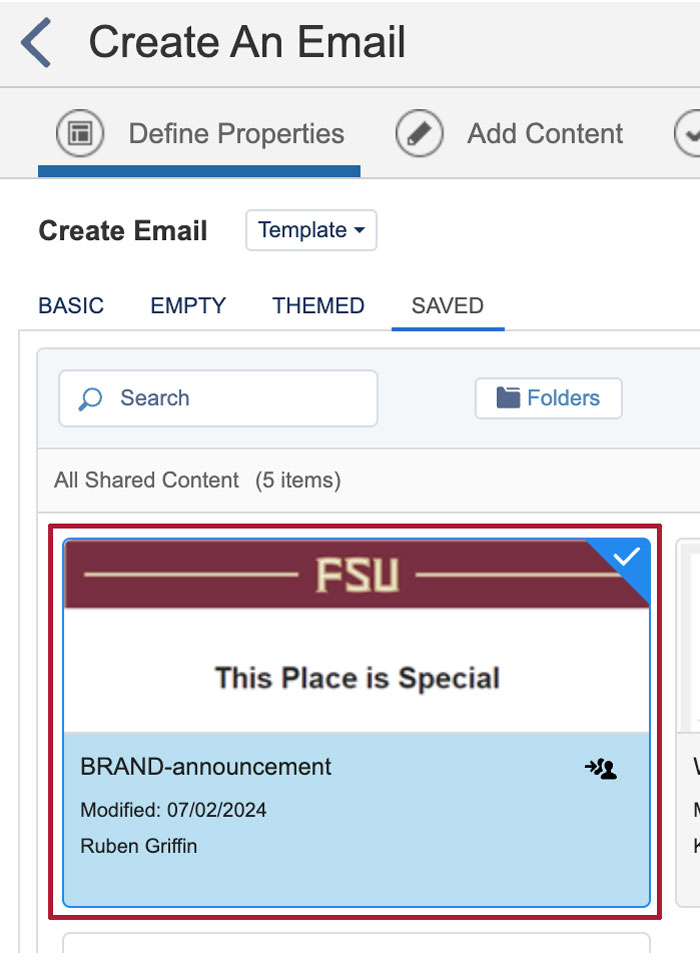
Step 5:
Select the BRAND-announcement template and choose Select at the bottom right.

Step 6:
Provide a Name (1.) for your email and ensure that the Location (2.) is correctly specified.

Step 7:
Select Next to proceed, and you will be able to customize the email according to your needs.